
Creating a Fantasy Device: Zoom Hologram
My first assignment as an NYU IDM student was to interview a classmate about a piece of technology that would fill a hole in their life. The solution could be unbounded from today’s technological shortcomings.
Concept Demo
Below is the latest iteration of the hypothetical solution I designed, using augmented reality. In this scene, a professor is showing his class how to conduct a chemical reaction, but it all goes wrong when the reagents unexpectedly explode!


Skills Learned
Client Interviewing
Motion Capture
3D Model Rigging
Software: Autodesk Maya + Adobe Aero
Interview Structure
Below is a flowchart of how I conducted the interview process with my classmate, Hima, all within a 30 minute class period. I started by finding what was missing in her life, and the emotional reasons behind her answer. Then, using her answers I made a problem statement to inform my prototype sketches. After my first sketch, I captured Hima’s feedback and implemented it into the next prototype sketch. I gave her a final presentation and gathered more feedback for further iterations past our class time.

Interview process contained within a 30 minute class period.
General Questions
Q: Is there something that has been missing in your life?
A: I’ve been doing many Zoom calls for school, and realized that they don’t mimic a physical presence well at all. I’m missing that component of conversation in my education.
…
Q: What is the medium of technology that you’d like to see your fantasy device operate in?
A: Something that’s a mix of digital and physical would be cool, like a projection/hologram or mini drones.
…
Q: What should this fantasy device provide for you?
A: I’d like to gain a physical context of the person and their surroundings.
…
Q: Are there specific senses you’d want to see displayed?
A: The 5 senses would make the experience feel more immersive. So touch, sound, sight… I’d like to feel the breeze of them talking or the vibrations of their voice for example.
Interpretation
Hima was looking for a device that would make her school Zoom calls more engaging and better replicate the physical cues of natural conversation. A device that could somehow project the current speaker’s image and project the 5 senses would do the job well.
Deeper Questions
Now I wanted to see the emotional and practical reasons behind her choice of a fantasy device and gauge a better sense of her specific needs.
Q: What are the emotional reasons that you’d like to see this technology exist?
A: The transition from the physical to virtual world was hard. I experience a lack of intimacy and emotional attachment to people. The human connection was missing. This resulted in a reduced quality of education. I had to convince myself to keep pushing through the learning process and tell myself that the virtual learning curve was worth it. I really want a way to make education still feel safe, while keeping the experience realistic and engaging.
…
Q: How would you feel if this idea was actually implemented?
A: I’d feel mentally present in class, and have reduced distractions since I could focus on the sensory cues of the professor or current speaker.
…
Q: How would this technology impact your confidence?
A: I’d take my education more seriously and feel more focused in class.
Interpretation
Clearly, the transition to fully virtual learning was difficult. A physical element of conversation would help keep Hima engaged in class and give her the confidence that she can manage other distractions and focus on the professor.
Problem Statement
“Hima needs a way to experience education with all her sense to stay engaged and build confidence. Unexpectedly, in her world, a conversation was so much more than a voice. Transformative virtual technology proved alienating.”
I constructed this statement using a template provided by our professor. This was the first design problem identification I had ever done! I used it to frame my prototype sketches.

First prototype sketch of a hologram projector accessory for video calls. Students can watch a recreation of the professor speaking, and can actually touch the hologram. The professor can take questions and interact with the student through the built in microphone + speakers.
Prototype 1
For the first prototype, I envisioned a hologram projection device that the student could actually touch. The device projects sound and also captures sound through a microphone (student can also adjust volume).
The current speaker that is highlighted in the Zoom conversation is the person who is projected. When the professor is speaking, the students see them. When the student is asking a question, the class and the professor see the student.
Feedback
Overall, Hima was satisfied with the concept, but wanted to see more details about how sound, breeze, and touch would be transmitted. She also wanted to scale the image up and down, with more customizability.
Prototype 2

The second prototype shows the ability to modify the hologram settings, and an explanation of the nanoparticle system that enables the sensation of touch.
To address Hima’s critiques, I added the ability to size up and down the projected hologram. I showed that the 3D image was made up of moldable nanoparticles that would push in a little when poked to replicate real sensations. The particles can rearrange to show any image and the speaker’s immediate surroundings.
In the meeting settings, the student can enable High Fidelity (HiFi) mode. This would activate the built-in HiFi speaker to transmit a wider range of frequencies, allowing the student to feel vibrations and provide a more immersive audio experience.
The device also has holes that can emit scents or create a breeze. This would be especially helpful in a chemistry lab setting for example, where the signal of a chemical reaction occurring is a certain smell.
Feedback
Hima liked these additional improvements and exclaimed that she wished such a device existed! She said that this device would vastly increase her engagement and excitement in class.
Augmented Reality Implementation
Here’s are the steps I took to translate my prototype sketches into an AR demo of my idea:

Our Mobile Augmented Reality professor taught us that the easiest way to get a rough idea across in AR is to appropriate free models from the internet and integrate it with our own 3D objects. I used this opportunity to make a demo animation sequence using our Motion Capture room here at NYU IDM! The plan was to capture the motion into an animation, add a skin onto it, then create a scene using objects downloaded from the internet.
After brainstorming a few ideas and calibrating the sensor in the room, my classmate Arwa and I placed markers on our model, Kristian, and our objects. I directed Kristian’s movements while Arwa helped move around the objects.
Idea
The scene would show a professor conducting a chemical experiment in front of his virtual class. Everything is going fine, until the reagents unexpectedly explode! The professor goes flying backward and I imagined there to be a big plume of gas.
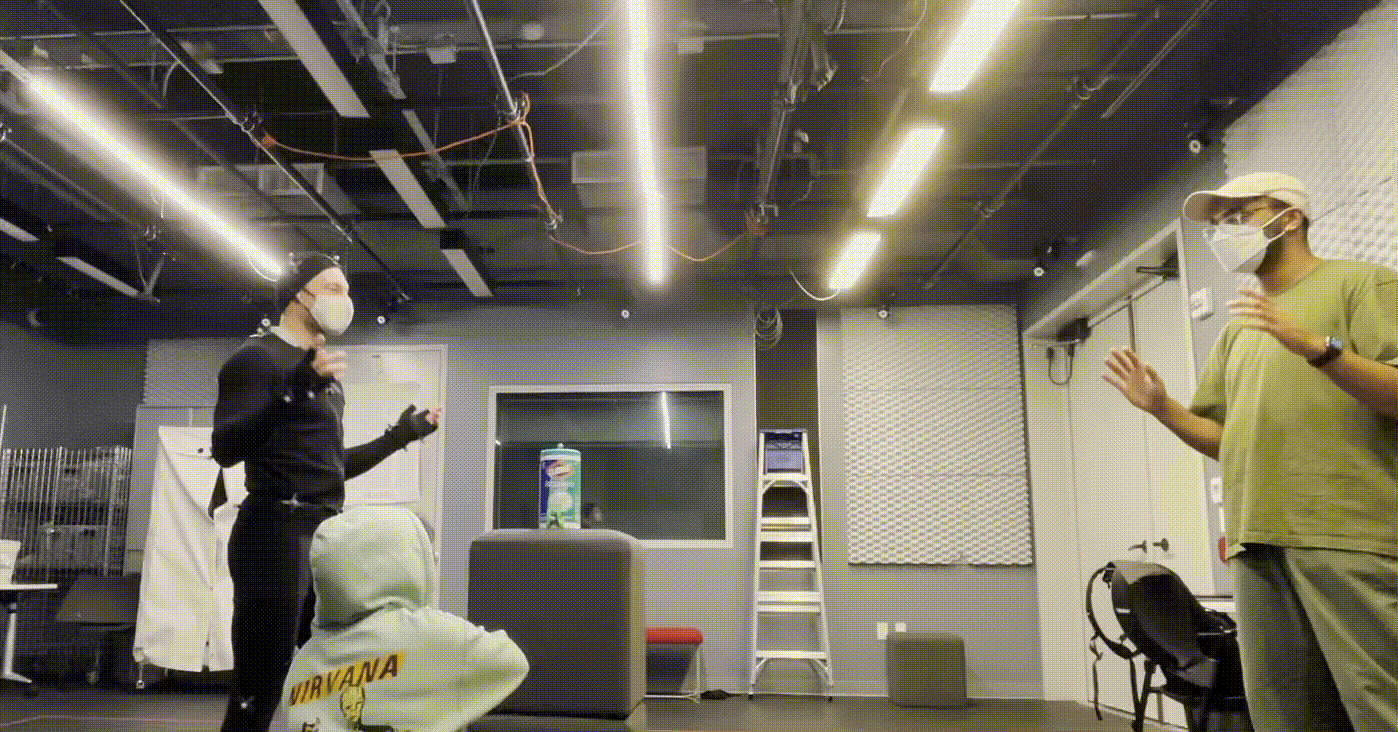
Here’s me directing the explosion scene. Kristian, the actor, is being recorded 360 degrees by all the cameras in the MoCap room. You can see them glowing white around the edges of the ceiling.
Next, I exported the footage from this recording into Autodesk Maya. Here’s what the raw footage looked like:
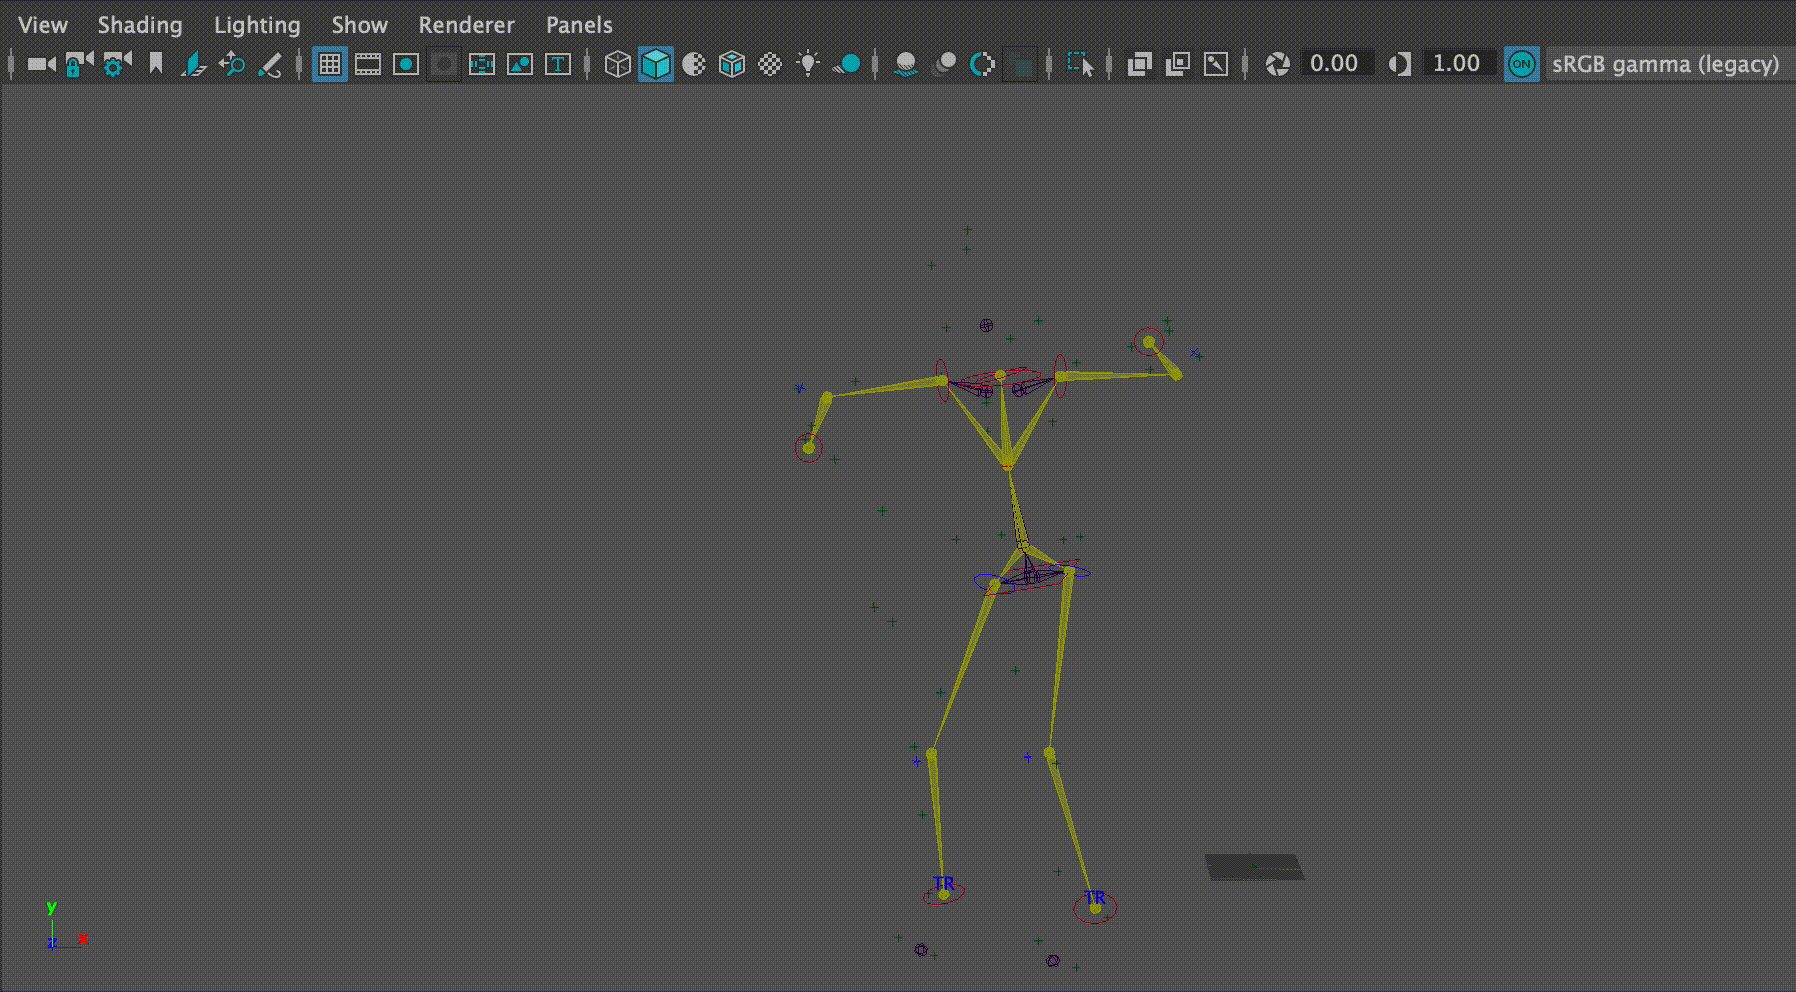
Next, I added a skin to the animation in Maya. This process is called model rigging. It was the first time I’d ever attempted skinning my own motion capture footage with a 3D model! I also began adding in other 3D objects to complete the scene.

From here, I just exported the footage into an .fbx file and imported it into Adobe Aero. I added a futuristic desk model and created a hologram chalk board complete with chemistry equation.

I dragged in a model of the Amazon Alexa Echo smart speaker. I imagined that this existing device could somehow project a hologram from its top. The inbuilt microphone and speaker would enable communication. I also envisioned it having a smell generator and a fan to simulate breeze.
Now that the model and animation was loaded into Adobe Aero, I could shoot a little demo video, integrating the model into the real world! Here’s the demo video:

Challenges
I wanted the explosion to result in a large plume of gas. In Maya I made a particle generator with really fancy motion and pretty colors. However, I couldn’t export this into Adobe Aero as an .fbx! So I had to give up on that idea. Here’s what it looked like:

This was my first time working with motion capture and I did not anticipate how finicky model rigging can be. I had to manipulate the recorded footage quite a bit to fit the “T-pose” that Maya wanted. But, the results were rewarding.
Future Improvements
Later on, I realized I could have exported that plume animation as a simple 2D GIF into Adobe Aero, so I’d probably implement that. I’d also like to add sound to further convey the story, and perhaps make a fake advertisement to sell this hypothetical technology. The video would show an example user with a background story, and overall would flesh out the idea more.
Learning Outcomes
I learned how to interview a potential client to get deeper emotional reasons behind their desires. Then, I took that knowledge and experimented with sketching prototypes, then using motion capture and 3D objects to convey my idea. This process of recording MoCap and rigging models in Autodesk Maya was invaluable, and taught me the fundamentals of 3D animation. I also was able to explore how to augment our real world using Adobe Aero. I’m excited to spend more time learning these technologies, as I’d like to integrate them into my career.